I am getting ready for this week and, since its fall, have decided to do the letter A so that we can do apple and autumn. Using index cards I wrote "I see a/an/the" (one word on each card). Now I am printing pictures off the internet of words that begin with the letter A: angel, ark, animals, aardvark, alphabet, acorn, ant, acorn, apple, and ape. I will put one picture at a time at the end of the sentence and let Lillian "read" the sentence. The first couple I will need to demonstrate, then we can do a couple together, and then she should be able to read the sentence on her own by the third day or so.
I have also gathered up some Arthur books for us to read. I am planning a trip to the orchard to get some apples and we'll be making apple ring (flatten biscuits, put a little cinnamon, butter and sugar on them, top with an apple ring and bake. Easy for kids to make! In addition, we can cut an apple in half to see the star shape inside, examine and count the seeds, and do floating experiments with the apples.
Another activity we'll do is play matching the alphabet (an "a" word!) - simply matching uppercase and lowercase letters.
We went out in the woods this past week and picked up acorns in preparation for this weeks activities. We can also use the acorns, along with the apples, to do science (float, magnifying glasses, etc), but in addition we can use them for math: adding, subtracting, cover up a number and have her tell me what number is covered; they can be used lots of ways.
I have an apple cutting sheet to provide cutting practice, and am making a large apple cut out so we can write fall words on them as we think of them the next couple of weeks. This way if she wants to write about a fall activity she'll have the words to refer to!
It's such a fun time of year and there's so much to do its hard to get it all in!

When you have a two year old boy and a four year old tom-boy, every day is an adventure! Thank God for children, patience, staying home, and extended family! Here are some cheap, fun, easy, and simple learning activities you can do with your young child. Remember, just have FUN with it!
Sunday, September 23, 2012
Saturday, September 15, 2012
P Week
We are currently making a list of P words. It is an ongoing list that we add to each day through out the week. Lillian loves thinking up words to add. Often we will be out and about or in the van when she thinks of them so they don't always make it on the list, but at least she's thinking about it all the time. At the end of the week I will tape her list to the wall so it is handy if she wants to refer back to it. As she tells me a word I try to draw a little picture beside the word so she has a picture clue too.
We read If You Give a Pig a Pancake and then we made PINK PANCAKES in the shape of a P. The kids enjoyed them and it was easy to do.
We have also read Peter Pan and we have Pinocchio out to read tomorrow.
Another fun activity we did was to pick up PERSIMMONS and then we made PERSIMMON PUDDING. The kids always love it when they get to cook and they were a great help and enjoyed the activity.
Lillian was sick this week so we still have one activity left to do: PAINT PUMPKINS! This is fun to do outside and is easy. I will incorporate math too by getting a variety of sizes and colors of pumpkins so we can sort them different way, group them, add them, and graph them.
For snack tomorrow we are going to have PEANUTS. It is fun to get these in the shells for the kids to break. Most kids don't realize peanuts come in the shell.
Our last activities will be to make PATTERNS using our pattern blocks and cut out shapes I have and to read a fill in the blank chart about PETS. Then we will make a PICTURE of our PET. It's going to be a busy weekend!
Wednesday, August 1, 2012
Chicka Chicka Boom Boom
If your children are as big of fans of this book as mine are they are going to flip over this activity! I bought a large Styrofoam cone, brown felt, green felt, small round Styrofoam balls, green duct tape, and florist wire to create my own coconut tree. I am not crafty at all, but this was really easy to assemble - and I didn't even have any directions! First I hot glued a large piece of brown felt onto the cone shape and painted the small balls brown. While those were drying I cut out coconut leaves from the green felt. Next, I used the green duct tape to tape the florist wire onto the back of the felt leaves. Then I stuck the other end of the wire all the way down into the top of the cone. When the coconuts were dry I put a florist wire in them and stuck them down the middle of the cone also. Lastly, I found some precut felt letters at a dollar store and voila - I have a prop to use when we're reading the book, which is written by Bill Martin Jr and john Archambault. (Make sure you get the felt flat on the bottom of the cone so your tree stands up by itself).


Thursday, July 5, 2012
Water and Paint don't mix activity

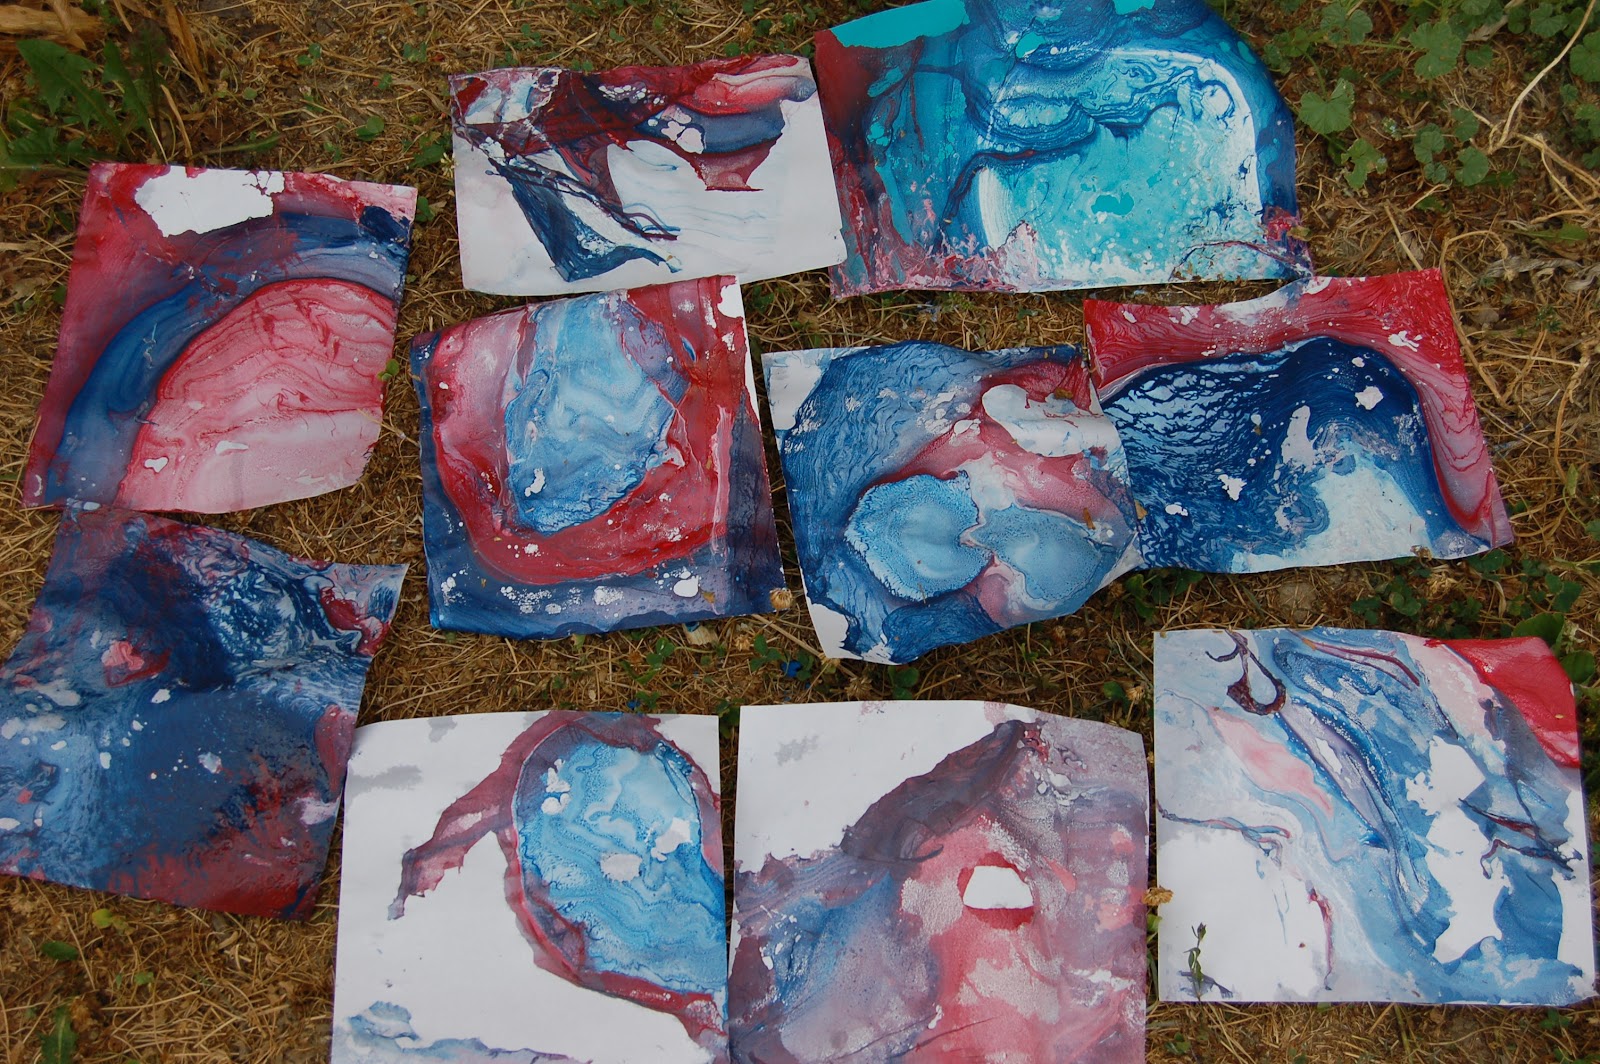
The kids really loved this activity. I have no doubt we'll be doing it again soon; maybe even tomorrow! I liked it because it is also a pretty interesting science lesson. You will need: an old container, water for the container, water for clean up, spray paint, and paper. Cheap spray paint works just fine, it doesn't have to be expensive. You can use as many colors as you want. We used up to three colors today. Lillian, age 5, was able to press the nozzle down on the cans, but Cole, who is now 3, had problems and needed some help with this part. Make sure you are outside and have on old clothes as the paint does not wash out (this is why you need an old container also).
Fill the container with water, spray paint on top of the water (it doesn't sink but floats on top of the water!), lay a piece of paper on top of the water/paint (don't push down much, just let it sit there), and then lift your paper up. Voila, art! We will use our papers as covers for journals. You may want to have your kids wear gloves since it doesn't wash off. However, I chose not to mess with them as they are usually so big on kids and they have problems working with them on. I just figure it will wear off in a couple days! Below is a picture of some of our final pictures drying. It is also helpful to have some news paper or something to set your work on to dry so it doesn't get grass or dirt on it.
Saturday, June 30, 2012
UNO!
One word: Uno! I just happened to think of this card game the other day. I hadn't played it in years, but we did when we were young, so I headed off to the store and bought us a deck (I think it was $4 at The Christmas Shop). The kids were excited to see a new game that night and wanted to play right away. The directions say the game is for kids 7 years and up but that just isn't true. Granted, Cole was to young at three years old and lost interest quickly, but Lillian was really into the game and caught on quickly. Needless to say the first few times we play we're going to have to help her learn how to play and the rules, but it isn't going to be long until she is teaching her friends how to play. Unfortunately it was to late, but she wanted to play again that night and again the next day, so I know we're on to something good here. We did find out they've added some new cards to the deck (skipping cards, and reverse cards for instance) since we played years ago, so be sure and review the directions before hand. This game is perfect though for teaching colors, numbers, turn taking, and, of course, good sportsmanship! We shook daddy's hand at the end of the game and congratulated him on his victory. We'll get him next time!
Tuesday, June 26, 2012
Dimes
Currenly Lillian and I are working on money, at this time its dimes. You do not want to overwhelm a child by introducing different coins at the same time. Instead, focus on one (generally you begin with pennies) and then advance up as they master one. However, continue to review coins previously taught so they retain that information. As I recently said, I purchased some hundreds charts. After I have given her ample time to explore the dimes on her own I had her place one dime on each box in the tens place on the hundreds chart. Then, as we say "ten, twenty, thirty" and so on she slides the dime off the corresponding box. We also reversed the process and counted by tens as we placed the dimes back on the chart. Next, we took turns placing one dime on a tens square while the other person covered her eyes. Then that person got to guess what number was under the dime! Simple activities like this are a game to children and they enjoy playing them over and over and do not even realizing they are doing a learning activity.
Saturday, June 23, 2012
Counting and Hundreds Charts
I picked up a pack of Hundreds Charts at the local teacher store (you can order them online too). In case you aren't familiar with hundreds charts they are a grid with the numbers from 1-100. I also bought highlighting tape; tape that is colored, but you can see through. It acts like a highlighter but is tape (highlighters will not work on the boughten charts because they have a type of lamination on them). On one board I highlighted just the tens row, another chart counting by fives, and another one even numbers. I also put one of the charts in Lillians seat back pocket in the van. That way it is available to her if she wants to look at it or use it, but it isn't being pushed at her. Sometimes these items just have to be available to children for them to become interested and to provide them with an opportunity to explore them on their own. She has already taken it out many times and talked about the numbers she sees. As a side note, you can also find a variety of different kinds of hundred charts online. If you used this option you could use a regular highlighter to mark them and put them in a clear paper sleeve to make them more durable. If your child seems overwhelmed by the vast number of numerals on the chart, just use a piece of paper to cover up the bottom portion. Often just taking away the access helps. The highlight tape is a tool to help her focus on just the digits I want her to concentrate on. Then we can use the appropriate chart to aid us as we learn to count by two's, fives, or tens. Later, I can use the same method to show odd numbers or counting by tens starting with a different number other than ten. That will come MUCH later though!
Thursday, June 21, 2012
Label Fun
Lillian had a ball today with my labeller. She started off typing in words she knew and could spell on her own. A little while later she progressed to asking me how to spell words. After typing in each word she printed it out. After awhile she started going back through her words sounding out the letters and decoding the word. She made up some name tags for us. Later in the evening she noticed I had mine on still and she came over and sounded out my name. Using the labeller was something new so it made learning phonics, letter recognition, and decoding fun! When done the words can be used to make a collage type of picture or put in a journal for them to refer to when they want.
Wednesday, May 23, 2012
Cupcake Game
I had problems getting a good picture of this game, so I hope I can explain it well enough that you can follow along. Here goes. Someone had given me a large plastic cupcake container from the store. I put a dollop of paint in each hole (one color at a time as we had to rinse our paint brushes in between each color) and the kids painted the bottom of each cupcake circle (don't skimp on the paint or it will flake off). Next, I used a hot glue gun and glued the plastic cup cake carrier to the base of the container (its black in the picture). After it was dry I used a permanent marker and to write a number in between the cup cakes. Then I put in two rubber bouncy balls. I chose a larger one and a smaller one, but you could use two different colored ones instead, but they must be different. Lastly, I hot glued the lid on.
How the game is played: The youngest child decided which ball he will use and then the older child goes first. She shakes the game thus moving the balls around. Each player must then decided which number they want to use (because some of the holes have 4 numbers around it; touching it) and then the second player decides which number he will use. The person with the highest number wins that round and the game proceeds on.
My kids really enjoyed this game because of the fun of shaking the container (movement) and the noise it made! My kids needed help reading the numbers and knowing their options but older kids will figure it out and be able to do it on their own.

Tuesday, May 1, 2012
Time Game
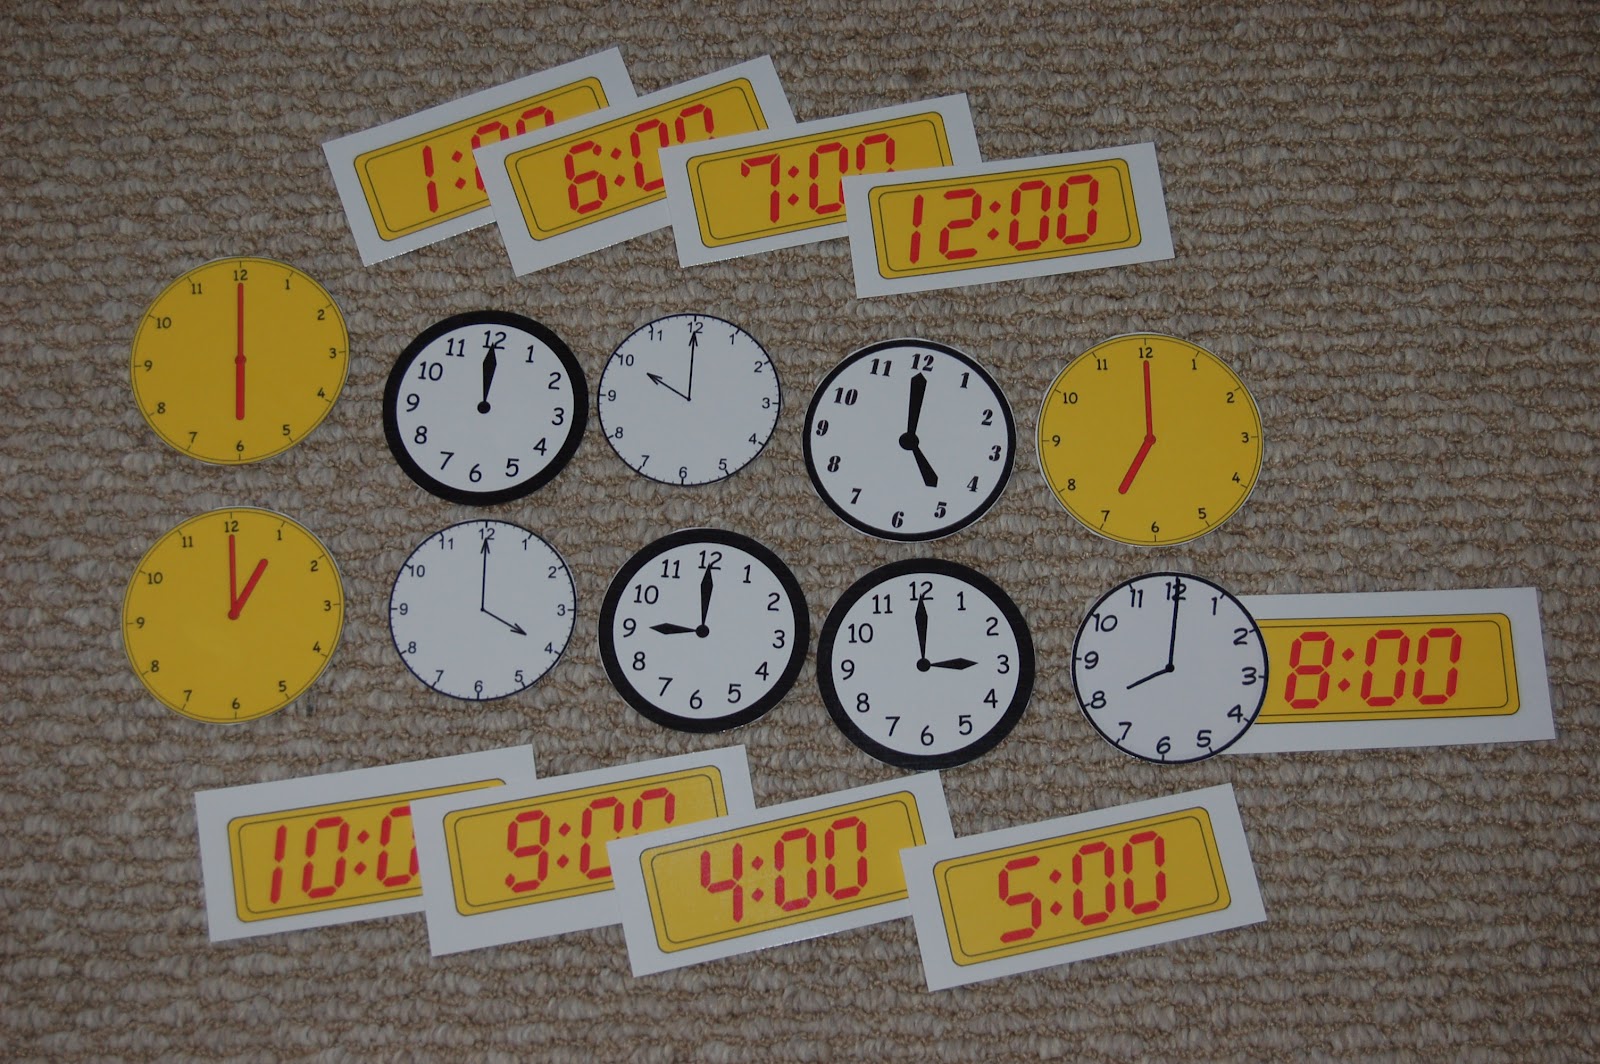
I went on line to find pictures of clock faces and digital time clocks. I decided to do an assortment of clock faces since not all clocks look the same in the real world. One of them (8:00) was blank and I drew hands for the time I wanted. Since Lillian is new to telling time I followed a few guild lines: All the clocks have numbers for every hour, there are no extra marks for the other minutes, and all the times I chose are on the hour. Later, when she's mastered this skill, I will do some time to the half hour. Cole enjoyed helping us play the matching game. He would choose the clock face and Lillian would find the digital time that matched it.
Saturday, April 28, 2012
Placemats
When the kids were younger I used place mats with the ABC's or shapes on them. Last week I found one with addition facts on it. Lillian has enjoyed using it. I just leave it sitting in the middle of the table. When she's in the mood she'll quiz us on the math facts, other times she'll read us the problem, and sometimes she wants us to ask her some of them. This exposes her to addition facts, how to read a table, and how to read the equations. We don't push it at all; its her instigating it and choosing to play with it. If you have a play kitchen the kids enjoy using the place mats in there also. In addition, sometimes when Lillian is wanting to write a word and has asked how to make a letter, I will get out our letter place mat so I can show her the letter on the place mat, model how it is written, and then she writes the letter. The mats are a good learning tool and are usually only about $3.
Friday, April 27, 2012
Addition Dice Game
This evening Lillian and I played a very simple dice game together. I got out two regular dice for us to use. We took turns rolling the dice and then adding the dots on the two dice up. Sometimes she knew the answer by looking, other times she counted on her fingers, and sometimes she counted the dots on the dice to come up with the answer. All of these solutions are perfectly fine. A couple times we rolled two even numbers, so after coming up with the answer, I pointed out that we could count by two's and still come up with the same answer. She enjoyed the game and we played it for about 10 minutes. At this age (5 years old now), most activities will be short due to their short attention span and that is ok too! I loved that their wasn't any prep required and that the only supplies needed were two dice. An idea for an extension or older child: after playing the game a few times so they could get the hang of it, they could make a tally sheet/graph as the game is played so they could see what sum came up the most!
Sunday, April 22, 2012
Marbles, Marbles everywhere
Cole has been especially interested in playing with marbles lately. Obviously you wouldn't give marbles to someone young or a child who puts things in his mouth, but luckily I don't have that problem with him. As he's playing with them he is learning. For instance, he hauls them around in his semi and likes to stop and start quickly and move the semi quickly to see how they roll and the noises they make. He also likes to put them in his dump truck; however, since it doesn't have a tailgate the marbles wouldn't stay in. So 1 row of duct tape on the back of the truck was added to hold the marbles in. He discovered that most the marbles stayed in but if he was going fast he lost some, so a second row of duct tape was added - problem solved! Other times the marbles are used in the play kitchen and they are discovering that different size containers hold different amounts. Granted, at times I get tired of finding a marble here and there and sometimes they get dumped and are everywhere. When I get tired of them they will disappear for awhile!
A is for Animals
This was an activity I did with both children at the same time. I have some animal magnets that I used, but you wouldn't have to use magnets; even just pictures of animals would work fine. After putting all the animals on the refrigerator we took turns asking questions about them. For instance: "each of you find an animal that has stripes, what is the tallest/smallest/biggest animal, what animal lives in water". We also talked about the sounds they make and how they move. From the age of 4 or 5 your child can also tell you the letter each animals name starts with and write it down.
Friday, March 2, 2012
Marshmallow Fondant
I used this recipe to cover Lillian's birthday cake a couple weeks ago. The colors were so bright and fun. As I worked with the dough I thought to myself "the kids would LOVE this stuff!" Luckily I ended up with left overs of three different colors. I got out plastic knifes, cookie cutters, spatula's etc and let the kids go at it. While the dough really isn't to messy or hard to clean up I had the kids work on baking sheets just to make it a little easier and I sprayed the toys, table, and their hands with Pam (I also taped wax paper on the table and we did it in the garage for easy clean up). Of course they were thrilled that they could eat the dough while they worked. It was a fun activity to do and the recipe I used follows. I got this one on line and there were lots of variations so you might want to see what else you can find. This was really simple and fast to make though. Note: we storedsome of the dough in the freezer for 2 months and it still did fine.
Put one large jar marshmallow cream in a mixer and slowly beat in about 3/4 bag of confectioner sugar. You may want to add up to 4 T water; it depends some on the weather that day. Add coloring if you wish. Grease Saran Wrap, roll dough into ball, put it in the Saran Wrap and place in freezer for 30 minutes. Dough is ready to use.

Put one large jar marshmallow cream in a mixer and slowly beat in about 3/4 bag of confectioner sugar. You may want to add up to 4 T water; it depends some on the weather that day. Add coloring if you wish. Grease Saran Wrap, roll dough into ball, put it in the Saran Wrap and place in freezer for 30 minutes. Dough is ready to use.

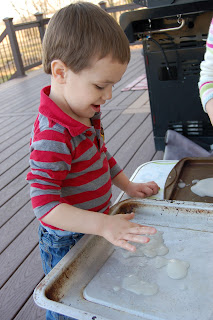
Exploring with sugar
Any child is going to love this activity and since it is perfect for any age its a good group or after school choice. The recipe for Edible Sugar Decorations follows. After awhile I added extra water to the concoction so the children could see that, while the recipe still smelled the same and tasted the same, it had a completely different consistency. It is perfectly ok to introduce these bigger words - just explain as you go what they mean and don't use a lot of them close together. Then try using the same word a few times during the next week or two. I sat a table up outside and gave Cole and Lillian each a cookie sheet for them to make their creations on. If you follow the recipe and don't add lots of water the children can use containers as molds - its like damp sand on the beach. You can also use food coloring to color the "sand" if you want. Here's the recipe:
2 cups Granulated Sugar, 4 tsp water, and 1/2 tsp Meringue Powder; just mix together.
2 cups Granulated Sugar, 4 tsp water, and 1/2 tsp Meringue Powder; just mix together.

Wednesday, February 1, 2012
Happy Valentine's Day Activity

This activity can be used with both my kids with some adaptions, so just make changes based upon your child's age. For Cole, who is two, we talk about the colors of the conversation hearts and the colors of the bowls, the shapes, and work on counting out the little numbers (for example 1-3). He enjoys doing the game with Lillian who is 4 even though they aren't doing the same activity. Lillian plays the game multiple ways depending on her mood (game always sounds like more fun I think!). Some days she just chooses a card (one of my previous post tells how to make them) and puts that many conversation hearts in the bowl. Other days she'll put the number cards in ascending order by their value. Today she was going to "guess" how many hearts were in the bowl. Of course I jumped at the chance to remind her that she could also use the word "estimate", which she did then. Another day you may want to play the game and change it a little; don't even use the bowls or cards, but count the hearts by two's to see how many you have in your hand. Watch your child for cues and see how THEY want to play today. They'll have more fun and will likely play longer than if we tell them how they are going to do it!
Sensory "table"

Lillian and Nicole love it when we get out the sensory tub. At school I had a $300 dollar sensory table, but of course here at home we don't have such luxuries so I created my own tubs! I use two different kinds depending on what we are going to put in it. During the Fall I used a long, heavy duty card board box that my sons train table came in. For this activity we got out our clear plastic tub. You need one shallow enough that the kids can reach in easily, but with high enough sides the items don't come out as they sift through the treasure. Today we put "rocks" in the table. I don't just have rocks in it though, there are also marbles, flower deco's they put in vases, etc. Some are round (good opportunity to teach the word sphere!), and others are round on one side but flat on the bottom. It goes with out saying that they are all different sizes and, of course, the colors vary. You can pick all of these, even the rocks, up at dollar stores so they can be obtained pretty cheaply. When we get done with a sensory item I store it in a clear container; plastic shoe boxes work well. Of course if you have young children who put items in their mouths you'll want to use larger items in your sensory tub until they out grow that stage. There are an endless number of possibilities for your tub: bows, ribbon, dry pasta, dried beans, and buttons are just a few ideas you might want to try. Don't hesitate to put an item in; what seems simple to adults children may spend hours exploring! Lastly, you might notice in the picture that I have provided the kids with measuring spoons, measuring cups, a bowl, a spoon, etc to use in the tub too. This helps them learn about volume and size and can help them develop large motor skills (filling the cups and dumping them into other containers).
Fall
We did this fun activity in the fall, but due to the busy holiday season I failed to get it posted! However, you can either keep it mind for next year or use it during another season using different "props." We began the activity by having "an adventure" as my children call it - going off to explore is another way they refer to it. No matter, we grabbed a couple buckets and trecked out into the fields and woods surrounding our house and our families and gathered Fall items; field corn, fall flowers, branches, leaves, nuts and I even bought a couple yams from the store! Next, I put all our "treasures" into a box or tub and just let the kids explore it on their own. The only rule was they couldn't take it away, it had to stay with the box. Then a few days later I layed down our painting mat (plastic table cloth), and got out paper, paint, and brushes. I demonstrated to the kids how each item made its own unique pattern and then they spent time painting with the items we had found. Later, they painted the items themselves. This is a wonderful activity to teach about patterns, shapes, soft/hard and to explore with.


Subscribe to:
Comments (Atom)