
When you have a two year old boy and a four year old tom-boy, every day is an adventure! Thank God for children, patience, staying home, and extended family! Here are some cheap, fun, easy, and simple learning activities you can do with your young child. Remember, just have FUN with it!
Sunday, April 22, 2012
Marbles, Marbles everywhere
Cole has been especially interested in playing with marbles lately. Obviously you wouldn't give marbles to someone young or a child who puts things in his mouth, but luckily I don't have that problem with him. As he's playing with them he is learning. For instance, he hauls them around in his semi and likes to stop and start quickly and move the semi quickly to see how they roll and the noises they make. He also likes to put them in his dump truck; however, since it doesn't have a tailgate the marbles wouldn't stay in. So 1 row of duct tape on the back of the truck was added to hold the marbles in. He discovered that most the marbles stayed in but if he was going fast he lost some, so a second row of duct tape was added - problem solved! Other times the marbles are used in the play kitchen and they are discovering that different size containers hold different amounts. Granted, at times I get tired of finding a marble here and there and sometimes they get dumped and are everywhere. When I get tired of them they will disappear for awhile!

A is for Animals
This was an activity I did with both children at the same time. I have some animal magnets that I used, but you wouldn't have to use magnets; even just pictures of animals would work fine. After putting all the animals on the refrigerator we took turns asking questions about them. For instance: "each of you find an animal that has stripes, what is the tallest/smallest/biggest animal, what animal lives in water". We also talked about the sounds they make and how they move. From the age of 4 or 5 your child can also tell you the letter each animals name starts with and write it down.
Friday, March 2, 2012
Marshmallow Fondant
I used this recipe to cover Lillian's birthday cake a couple weeks ago. The colors were so bright and fun. As I worked with the dough I thought to myself "the kids would LOVE this stuff!" Luckily I ended up with left overs of three different colors. I got out plastic knifes, cookie cutters, spatula's etc and let the kids go at it. While the dough really isn't to messy or hard to clean up I had the kids work on baking sheets just to make it a little easier and I sprayed the toys, table, and their hands with Pam (I also taped wax paper on the table and we did it in the garage for easy clean up). Of course they were thrilled that they could eat the dough while they worked. It was a fun activity to do and the recipe I used follows. I got this one on line and there were lots of variations so you might want to see what else you can find. This was really simple and fast to make though. Note: we storedsome of the dough in the freezer for 2 months and it still did fine.
Put one large jar marshmallow cream in a mixer and slowly beat in about 3/4 bag of confectioner sugar. You may want to add up to 4 T water; it depends some on the weather that day. Add coloring if you wish. Grease Saran Wrap, roll dough into ball, put it in the Saran Wrap and place in freezer for 30 minutes. Dough is ready to use.

Put one large jar marshmallow cream in a mixer and slowly beat in about 3/4 bag of confectioner sugar. You may want to add up to 4 T water; it depends some on the weather that day. Add coloring if you wish. Grease Saran Wrap, roll dough into ball, put it in the Saran Wrap and place in freezer for 30 minutes. Dough is ready to use.

Exploring with sugar
Any child is going to love this activity and since it is perfect for any age its a good group or after school choice. The recipe for Edible Sugar Decorations follows. After awhile I added extra water to the concoction so the children could see that, while the recipe still smelled the same and tasted the same, it had a completely different consistency. It is perfectly ok to introduce these bigger words - just explain as you go what they mean and don't use a lot of them close together. Then try using the same word a few times during the next week or two. I sat a table up outside and gave Cole and Lillian each a cookie sheet for them to make their creations on. If you follow the recipe and don't add lots of water the children can use containers as molds - its like damp sand on the beach. You can also use food coloring to color the "sand" if you want. Here's the recipe:
2 cups Granulated Sugar, 4 tsp water, and 1/2 tsp Meringue Powder; just mix together.
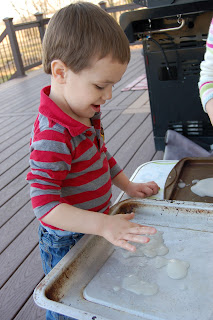
2 cups Granulated Sugar, 4 tsp water, and 1/2 tsp Meringue Powder; just mix together.

Wednesday, February 1, 2012
Happy Valentine's Day Activity

This activity can be used with both my kids with some adaptions, so just make changes based upon your child's age. For Cole, who is two, we talk about the colors of the conversation hearts and the colors of the bowls, the shapes, and work on counting out the little numbers (for example 1-3). He enjoys doing the game with Lillian who is 4 even though they aren't doing the same activity. Lillian plays the game multiple ways depending on her mood (game always sounds like more fun I think!). Some days she just chooses a card (one of my previous post tells how to make them) and puts that many conversation hearts in the bowl. Other days she'll put the number cards in ascending order by their value. Today she was going to "guess" how many hearts were in the bowl. Of course I jumped at the chance to remind her that she could also use the word "estimate", which she did then. Another day you may want to play the game and change it a little; don't even use the bowls or cards, but count the hearts by two's to see how many you have in your hand. Watch your child for cues and see how THEY want to play today. They'll have more fun and will likely play longer than if we tell them how they are going to do it!
Sensory "table"

Lillian and Nicole love it when we get out the sensory tub. At school I had a $300 dollar sensory table, but of course here at home we don't have such luxuries so I created my own tubs! I use two different kinds depending on what we are going to put in it. During the Fall I used a long, heavy duty card board box that my sons train table came in. For this activity we got out our clear plastic tub. You need one shallow enough that the kids can reach in easily, but with high enough sides the items don't come out as they sift through the treasure. Today we put "rocks" in the table. I don't just have rocks in it though, there are also marbles, flower deco's they put in vases, etc. Some are round (good opportunity to teach the word sphere!), and others are round on one side but flat on the bottom. It goes with out saying that they are all different sizes and, of course, the colors vary. You can pick all of these, even the rocks, up at dollar stores so they can be obtained pretty cheaply. When we get done with a sensory item I store it in a clear container; plastic shoe boxes work well. Of course if you have young children who put items in their mouths you'll want to use larger items in your sensory tub until they out grow that stage. There are an endless number of possibilities for your tub: bows, ribbon, dry pasta, dried beans, and buttons are just a few ideas you might want to try. Don't hesitate to put an item in; what seems simple to adults children may spend hours exploring! Lastly, you might notice in the picture that I have provided the kids with measuring spoons, measuring cups, a bowl, a spoon, etc to use in the tub too. This helps them learn about volume and size and can help them develop large motor skills (filling the cups and dumping them into other containers).
Fall
We did this fun activity in the fall, but due to the busy holiday season I failed to get it posted! However, you can either keep it mind for next year or use it during another season using different "props." We began the activity by having "an adventure" as my children call it - going off to explore is another way they refer to it. No matter, we grabbed a couple buckets and trecked out into the fields and woods surrounding our house and our families and gathered Fall items; field corn, fall flowers, branches, leaves, nuts and I even bought a couple yams from the store! Next, I put all our "treasures" into a box or tub and just let the kids explore it on their own. The only rule was they couldn't take it away, it had to stay with the box. Then a few days later I layed down our painting mat (plastic table cloth), and got out paper, paint, and brushes. I demonstrated to the kids how each item made its own unique pattern and then they spent time painting with the items we had found. Later, they painted the items themselves. This is a wonderful activity to teach about patterns, shapes, soft/hard and to explore with.


Subscribe to:
Posts (Atom)